Member Gallery
Likes: 8
Waiting since xmas 2020 to start these.

Likes: 8
Had to melt some of the railbed between the ties.

Likes: 9
Broke off a number of clips trying to push rails thru. Ended up melting and trimming the railbed. The ties didn't all go the same height so had to play around with it to get what I wanted.

Likes: 8
Don't know if it was the kit or me but pins didn't line up with holes.

Likes: 8
Glued all the railbeds from the four Trumpeter kits and ended up with 6.5 ft of railbed. Had to use a small wooden block to push the rails thru the clips in order to save my fingers.

Likes: 8
Again don't know if them are me but rail connectors didn't match up.

Likes: 8
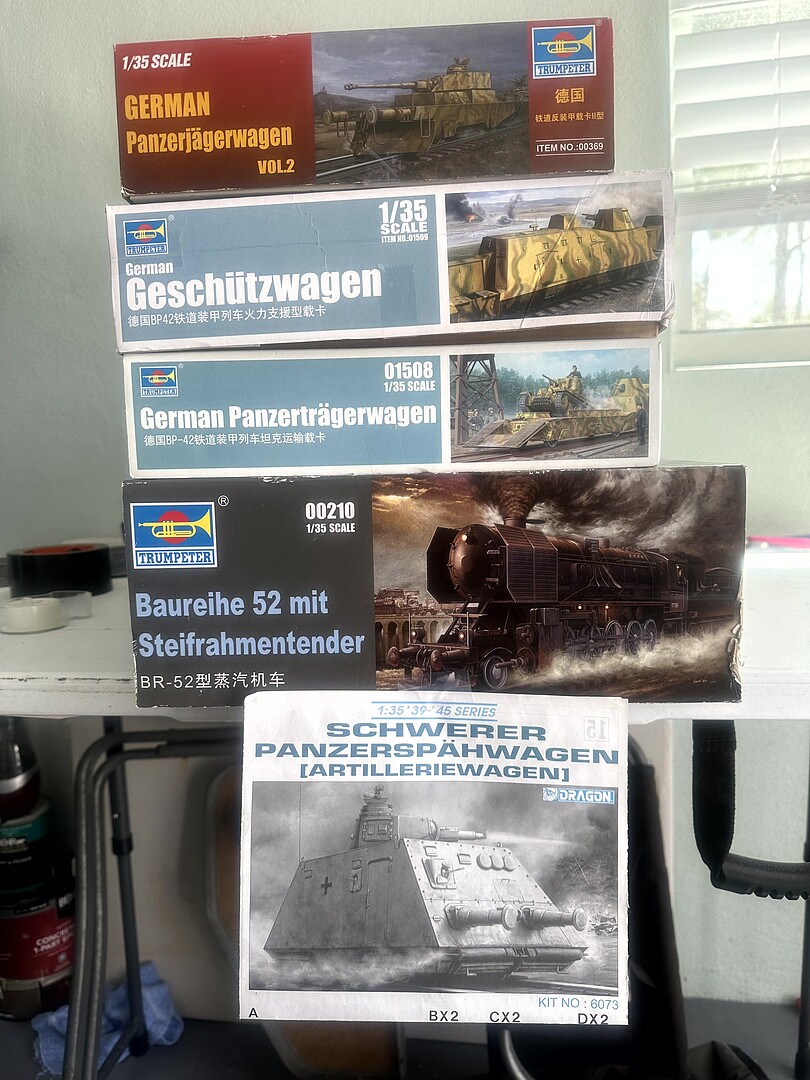
Top rail is from the Dragon kit. Bottom rail from Trumpeter. Used all the Trumpeter railbeds.

Likes: 8
The usual fit problems with Trumpeter.

Likes: 8
The piece with the blue tape has pins that fit the holes on the bottom piece. Found it was easier to just sand down the pins rather than force them in. They don't move anyway and didn't want to break them by forcing them in.

Likes: 8

Likes: 8
Once tabs were taken off the tanks fit fine.

Likes: 8
An example of the flash I was constantly coming across.

Likes: 8
My fault. The door didn't fit the opening so I trimmed it, I mean I really trimmed the heck out of it.

Likes: 8
After putting in the pieces for the windows they were too long. Fixed it then found the pair for the other windows were too short. Could have switched pieces and solved two problems. Don't be like me and watch what you are doing.

Likes: 8
Getting close to the end. Now I need to flip it over to work on the underside.

Likes: 8
Ended up making this contraption to hold the engine upright while I work on the underside.

Likes: 8
Ready to start on the bottom, again.

Likes: 9
One part of the kit I actually like.

Likes: 8
Had a problem with getting the braces to stay in place. Ended up using super glue, I used a lot of super glue on this kit.

Likes: 9
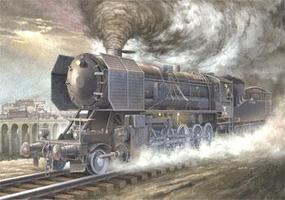
Done with the engine now onto the coal car.

Likes: 9

Likes: 9

Likes: 9

Likes: 9

Likes: 9

Likes: 9
Finished product. Didn't have much to say about the coal car as it went together pretty simply.

Likes: 9

Likes: 9

Likes: 8

Likes: 8

Likes: 8

Likes: 8
The car in front is from Dragon.

Likes: 9