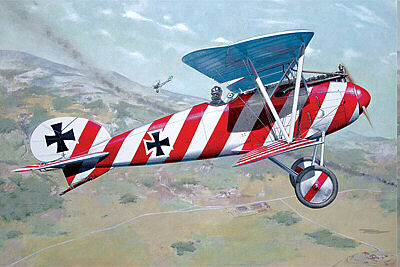
The first model kit I ever purchased was an Albatross way back in about 1964. I didn’t have glue to put it together correctly, and white glue didn’t work to good. But I cut out the decals and slapped them on. Modeling has been a fascination with me ever since, and the Albatros has been a favorite kit that is always calling my name. Roden has some really nice kits of the Albatros D.III. This kit is almost the same as the Roden Albatros D.III with a few minor changes. So, I could not resist building a few. The box top scheme of red and white stripes was very appealing. Next thing I knew this kit was on my desk and the proper glue was out.
Roden gives you some very accurate and logical instructions. The CAD drawings are very clear and don’t leave you scratching your head. Almost all the pieces from the five sprues are used. The plastic Roden uses is a little on the soft side, so use caution trimming or removing parts from the sprues because the tools will really dig in. The engraving is very nice. There is no flash or warpage. So on to the build.
The build begins with the engine and various internals. The fit is good, but some of the smaller pieces are prone to damage when removing them from the sprue. The build continues with more internals, the empennage, and the upper wings. Now we are ready to bring the fuselage halves together. It is very important to insure everything is aligned properly, which is not hard to do. Attaching the lower wing also helps to hold things together. Attaching the guns, engine cover, the empennage, and exhaust are the last step before the upper wing. It is good to ensure there are holes drilled in the upper and lower wings, as well as anywhere else the rigging will attach. I use .03 steel wire also known as piano wire for all the rigging. It is stiff so it actually makes the model a little stronger. Now it is easy to add the wings, last of the exterior details, and rigging. It is important to plan out how you are going to assemble and paint this kit. As far as WWI aircraft go, this kit is not too difficult. The rigging is relatively easy when compared to other WWI kits. The paint schemes are good to test your skills with an airbrush and masking. Decals are good and settle well with some setting solution. But the most important thing is that this kit looks great when finished.
This kit gets high marks all around for fit, molding, decals, subject matter, and instructions. It is a medium easy to hard kit to build because of the rigging and painting. Overall, I would rate it as a great kit and I will definitely recommend it to a friend.
