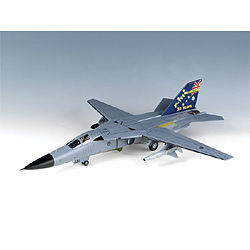
I initially never had much of an interest in the F-111, but a guy asked me to build him one, so I was inclined to try my hand at it. Initially I looked at the size of the kit, which in 1:48 is a bit large. I was happy to accept the challenge, as I've always been a sucker for larger scale builds. From the start, things were looking okay. The cockpit was a decent fit, and left plenty of room for detailing, which I like to do. Looking back, most of it was a waste considering that the way that the canopy seats, it'll cover most of it up. I elected to press forward as usual. This plane builds up as several different sections, nose, center, and aft. From my experience, any time you have that much stuff that all needs to come together, then it had better be engineered really good, otherwise you just bought yourself about three weeks worth of sanding, cutting, filling, and sanding again. This one wasn't as bad as it could have been, but there was certainly areas that were problematic...most notable was the nose section fitting to the fuselage. There's not really much of any sort of alignment tabs to help this fit together, so you're kind of forced trying to hold the thing in place, glue, realign, and squeeze all at the same time. No easy feat for three people, much less just one. If and when you get around to sanding, go ahead and expect to pretty much obliterate any and all of the engraved detailing that is on the surface of this thing, as it's all going to pretty much disappear. If I was a novice or new modeler I would say that perhaps this fit issue was just due to my skills, but let's face it....new or novice modelers don't care about gaps, sanding, or filling, and I've been at it a while. I can see why this plane was nicknamed the Pig. Another thing that perplexed me for quite some time was the drawing on how to assemble the main mount hub for the main landing gear. I must've studied the drawing on several occasions, and was still scratching my head. One of the things that stinks about this kit, is that they offer new parts, then have you modify them by cutting, which then resembles parts that were from their old released kits...that are still on the sprues themselves. I hate when companies change things up, but still leave the old parts on the trees, it makes a build confusing, and I don't care how many times you build a model, every time I'm throwing away a parts tree with nothing missing off of it I have to question whether or not I missed something. Sadly, it's just kind of how this all went. Finally managed to roll through it enough to where I got the gear part figured out. It's grossly under detailed, as well as the wheel bays themselves. There's very little you can to liven them up without just going all out and scratch building parts to add realism and detail, and that wasn't part of what the guy wanted, so I wasn't going to invest any further time into it. For the most part, once the gear are installed, you can't see any of it very much anyways. The wings did have a very cool feature where they're intended to swing the pylons as the wings swing, which did work for about a week until one of the parts snapped off, leaving that pylon to fend for itself during wing swings. I didn't really get too surprised when it happened, simply based on my experiences to that point. The wing swing system is okay, and seems to work, but I think there should have been some sort of internal braces or something to beef this thing up a little bit, as when you build it it just really feels, sounds, and looks hollow on the insides. I was surprised that nothing managed to fall out or off from this. And the last two issues I had were the decals. If you follow the paint scheme per the directions, then apply the decals...you're going to be disappointed. The paint was entirely too dark to let the decals stand out, and in the end most of them weren't even noticeable. If I could have gone back, I would have gone a much lighter gray on the base coat, giving the decals a chance to pop out. The decals gave me lots of problems with being thin and wanting to develop silvering problems, but that wasn't nearly as bad as the fact that none of them wanted to stick. It was like as soon as they came off the backing paper, there was no adhesive left on them. Frustrating to say the least. All in all, I'm not a huge fan of this plane to begin with, but to build a bad model representation didn't help the cause any further. I wouldn't recommend it for anything other than the fact that it is pretty cool just in sheer size when it's finished, but to some that doesn't matter much.
