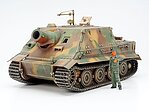
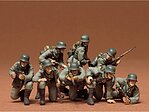
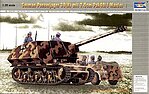
German Assault Tank IV Brummbar Late Prod.
This is the 1/35 Scale German Assault Tank IV - Brummbar Late Production Plastic Model Kit from Military Miniature Series by Tamiya. Suitable for Age 14 & Older.

(9)
Tamiya # tam35353
Website security verified by GoDaddy.
Member Gallery
(Pictures shared by our community)
;)
;)
;)
;)
;)
;)
;)
;)
;)
;)
;)
;)
;)
;)
;)
;)
;)
;)
;)
;)
← Swipe To View More →
You Might Also Like


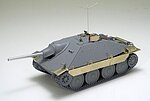


← Swipe To View More →
Features
- Highly detailed plastic pieces molded in tan.
- Gun offers elecation and traverse movement.
- Multiple parts recreate Schurzen side armor.
- Rubber-rimmed and all-stell road wheels.
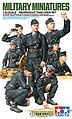
- 1 torso figure and 1 full body figure.
- Waterslide decals.
- Illustrated instructions.
Specs
- Scale: 1/35
Includes
One plastic model
Requirements & Suggestions
- Assembly
- Modeling Knife (EXL16001) (XACX3627) (EXL16018)
- Plastic cement (TES3501) (PLS00002) (TAM87012) or glue (HLC107)
- Sprue Cutter (XUR410A) (EXL55594)
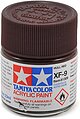
- Paint (Red Brown, Dark Green, Dark Yellow, Green, Red, Gunmetal, Flat Black, Flat White, Flat Brown, Flat Flesh, Khaki, Metallic Gray, Olive Green, Field Gray, Dark Iron, Rubber Black)


← Swipe To View More →
Product Rank
#213 in Plastic Model Military Vehicles
#767 in Plastic Models
Reviews |
Markings
- One decal sheet with markings for 2 versions
- 1) 216th Assault Tank Battalion, Eastern Front, Late 1944 to Early 1945
- 2) 219th Assault Tank Battalion, Eastern Front, Early 1945
Comments
Due to small parts that could cause a choking hazard please kee away from children 3 years of age and younger.
Others Also Ordererd


← Swipe To View More →