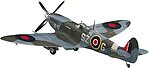
Spitfire MK IXC RAF Fighter
Item Number: hsg09079
4.3 Stars (13 Reviews)
Hasegawa
Spitfire MK IXC RAF Fighter
Item Number: hsg09079
4.3 Stars (13)
Now $26.99
Save 15%
$31.99
Earn 769 Rewards Points
Add to Cart

About This Item
Product Details
This is a 1/48 Scale Spitfire Mk.IXc Plastic Model Kit from Hasegawa Hobby Kits.
Product Rank
Includes
One 1/48 Scale Spitfire Mk.IXc Plastic Model Kit.
Features
- 101 medium grey plastic pieces molded to sprue trees.
- Clear pieces for canopy included.
- Single seat cockpit.
- Recessed panel lines give authentic look.
- Detailed cockpit and landing gear.
- Realistic propeller and de-icing device.
- Full armament package.
- Detailed pictorial instructions.
Requirements & Suggestions
- Assembly
- Plastic cement (TES3501) (PLS00002) (TAM87012) or glue (HLC107)
- Modeling Knife (EXL16001) (XACX3627) (EXL16018) or Sprue Cutter (XUR410A) (EXL55594)
- Tweezers (TAM74003) (EXL30416)
- Water for Waterslide Decals
- Paint
- Paint Brushes
- Pin Vise (TAM74050) (ZON37-145) (SQU10801)
- Toothpicks or Glue Tips
Specifications
- Scale: 1/48
- Length: 7.7" (19.8cm)
- Wingspan: 9.2" (23.4cm)
- Hasegawa Product Number: 09079
Reviews
Nicely made
By: sharpe_wr
Hasegawa kits are not bad for the money. They go together well and the parts are pretty clean. I am looking forward to adding the RCAF aftermarket decals I have to this kit. Recommended.
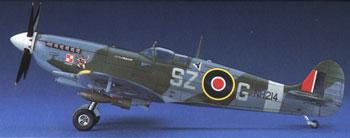
Hasegawa 1/48 Spitfire Mk IXc, 1/48: No. 09079
The Hasegawa 1/48 Spitfire Mk. IXc, No. 09079 is an excellent kit for its price point. Critics of this kit claim that it is slightly smaller in scale size then it should be, and the propeller is oversized for its scale. However, the kit's strengths greatly exceed these minor criticisms. Parts fit is precise, and the level of detail is excellent. As the kit does not have seat belt detail molded on the seat nor is there a seat belt decal provided, I used photo etch seatbelts from the Eduard No. FE203, Spitfire Mk. IXc for Hasegawa kit detail set. I also used the Montex Mini Mask, Item Code SM 48020 to mask off the clear canopy parts. Upper surfaces were painted using an airbrush to apply Vallejo British Standard Dark Green and Vallejo Ocean Grey. The Vallejo Sea Grey was too dark in tone for the undersurfaces of this aircraft, so I used Granite Grey acrylic paint as a substitute under surface color. I opted to build the No. 316 Squadron Royal Air Force version flown by Polish pilots. This version had the full elliptical wings and rounded vertical tail plane. The kit also allows the builder to make a clipped wing version with the peaked vertical tail plane from No. 449 Squadron, Royal Air Force. The kit's decals were in register; however, they were thick in contour. The decals required copious amounts of Micro Sol (red label) to make them conform to the surfaces of this model. The underwing roundrels and the decals over the gun ports had to be perforated during their installation. The numerous stencil decals were tedious to install but added visual interest to the aircraft. The use of precision tweezers, a magnifying glass and toothpicks were used for this time-consuming task. Decal silvering was avoided as the decals were installed over a Rustoleum Spray Gloss enamel finish.
Once the decals were installed, a protective coat of Johnson's Floor Polish (i.e., Future Floor Wax) was airbrushed over them. I then panel washed the recessed panel lines with Tamiya Brown Panel Liner. This was then sealed in with a final coat of Rustoleum Spray Matte enamel. Exhaust and gunport stains were added using Tamiya Weather master pigments. This kit is recommended for intermediate to advanced fine scale modelers with airbrush and decal installation skills. With careful attention to assembly, painting and weathering an excellent result can be obtained with this kit.
awesome-so SICK
**Review: Superlative Spitfire 1:48 Scale Model Kit – A Perfect Blend of Precision, Detail, and Enjoyment**
If there’s one aircraft that has become synonymous with both elegance and historical significance, it’s the Supermarine Spitfire. A staple in the annals of aviation history, this legendary fighter played a crucial role in World War II, and building a model of this iconic aircraft is both a privilege and an experience that every modeler should try at least once. With that said, I recently had the pleasure of tackling the Supermarine Spitfire Mk. I 1:48 scale model kit, and I can confidently say it’s one of the most rewarding builds I’ve ever undertaken. This kit is a masterpiece in every sense of the word.
The level of detail, the precision engineering, and the overall build experience make this model a joy from start to finish. There’s a genuine sense of artistry and craftsmanship that’s been poured into the design of this kit, and the final result, when completed, is nothing short of breathtaking. If you're someone who appreciates the intricacies of aircraft design and the satisfaction that comes with putting together a well-engineered model, this Spitfire kit will leave you thoroughly impressed.
In this review, I’ll break down every aspect of the kit—its assembly, parts, instructions, fit, decals, painting, and overall build experience—so you can get a comprehensive look at what makes this model one of the best available in its scale.
### **Unboxing and First Impressions: The Thrill of Opening**
Let’s start with the unboxing experience. As soon as you open the box, you’re greeted with an organized layout of parts. The box art is stunning, with a depiction of the Spitfire soaring through the skies, complete with a beautifully detailed color scheme. Inside, everything is neatly packaged in plastic bags to keep the pieces protected. It’s immediately clear that the manufacturer has taken great care to ensure that this model will be easy to assemble, and the quality of the parts promises a high-end building experience.
Upon closer inspection, the plastic feels solid and durable. The pieces are well-secured in their respective sprues, and there’s no sign of any damage from transit. This first impression of attention to detail is an early indicator of the quality of the build process that lies ahead.
### **Instructions: Straightforward and Well-Illustrated**
One of the most important elements of any model kit is the instruction manual, and the Spitfire 1:48 scale model kit does not disappoint. The instructions are clear, concise, and easy to follow, with well-detailed diagrams that take you through every step of the assembly process. The steps are laid out logically, with easy-to-understand numbering, and the text is written in a way that is accessible even to those who may be newer to modeling.
The assembly guide also includes tips on how to handle the more delicate parts, such as the cockpit details and the landing gear, which can sometimes be tricky to get right. These little touches show that the manufacturers care about making sure you not only complete the model but do so with an understanding of its intricacies.
What stood out to me was the attention to detail in the instruction manual. There are occasional notes that explain the significance of certain features on the Spitfire—historical context that adds a layer of appreciation for the aircraft as you build it. This not only enhances the build process but also enriches the experience by making you feel more connected to the aircraft you’re creating. It’s a great example of how a kit can elevate your understanding and appreciation of aviation history.
### **Parts: A Treasure Trove of Detail**
Once you dive into the parts themselves, you quickly realize just how much effort has gone into creating them. This is not a kit where the parts are generic or rushed—each component is finely crafted and molded with extreme precision. The plastic is smooth, with no noticeable flash or imperfections, and the parts fit together beautifully with minimal effort required to clean them up.
The detailing on the parts is truly impressive. The cockpit, for example, features highly detailed instrument panels, control sticks, seatbelts, and sidewall details that will be a joy to paint and weather. The panel lines are finely engraved and provide just the right amount of depth to make the final model look realistic without being overdone. The fabric-covered surfaces on the wings and fuselage are expertly replicated, giving the model a lifelike texture. Every rivet, bolt, and panel is crisp, clear, and defined.
The engine and propeller assembly are equally as well-executed. The engine is designed with enough depth and accuracy to make it a standout feature in the finished model, and the propeller blades themselves are thin, delicate, and molded beautifully. If you’re someone who loves to add extra detail and customization to your builds, you’ll find plenty of opportunities to do so with this kit.
### **Fit and Assembly: A Seamless Experience**
As soon as you start putting the parts together, it becomes immediately apparent that this kit was designed with precision and care. The fit of the parts is fantastic, with almost no gaps or misalignments, which is a rarity in some model kits. The fuselage halves come together perfectly, and the wings fit snugly into place with little need for sanding or filler. The landing gear assembly is secure and sturdy, and the wheels fit into place with minimal effort. There’s just the right amount of tension in the joints, ensuring that the parts stay in place as you work, but they’re not so tight that they make assembly difficult.
One of the standout features of the assembly process is how well the cockpit fits into the fuselage. The detail on the cockpit is so intricate that it’s almost a shame to close it up, but once the two halves are joined, the parts fit together seamlessly, leaving no unsightly gaps. The seams between the wings and the fuselage are barely noticeable, and the horizontal stabilizers and tailplane pieces align perfectly.
Overall, the build experience is smooth and enjoyable, with no frustrating moments of trying to force parts together or dealing with misaligned sections. The pieces click together with a satisfying precision that makes the entire process feel like a breeze. There’s no need for excessive filling or sanding, and once the model is assembled, it’s already a thing of beauty. The engineers behind this kit have truly created something remarkable in terms of both design and ease of construction.
### **Decals and Markings: Perfectly Executed**
The decal sheet that comes with this kit is impressive in its own right. The decals are thin, crisp, and incredibly well-printed, with a variety of options for different Spitfire squadrons, allowing you to choose from a range of authentic historical markings. The colors are vibrant, and the printing is sharp—no fuzziness or smudging. The decals adhere easily to the model surface and settle down smoothly when treated with a little decal solution. Even the tiny stencils and serial numbers are legible and precise.
What I particularly appreciated was the inclusion of several different versions of the famous Battle of Britain camouflage patterns. You have multiple choices for the nose art, wing roundels, and tail fin markings, each offering a different story behind the aircraft. This variety not only adds to the model’s authenticity but also gives you the option to create a truly unique version of the Spitfire.
The decals were easy to apply and settled perfectly into the surface detail, even over the more complex curves of the fuselage. There were no issues with them lifting or tearing, and once applied, they looked painted on—blending seamlessly into the surface. After sealing them with a clear coat, the final result had an incredibly polished, professional finish.
### **Painting and Finishing: The Cherry on Top**
The painting process is where you really get to see the craftsmanship of this kit shine. The model’s surface is smooth enough to allow for even coats of paint, and the fine panel lines and rivets ensure that your paint job will have the depth and realism needed to make the Spitfire truly stand out.
The instructions suggest a basic camouflage pattern, but the real fun comes in weathering and detailing. Whether you choose to apply a subtle wash to highlight the panel lines or a more worn, battle-hardened finish with chipping and fading, the model holds up beautifully to various painting techniques. The cockpit is particularly satisfying to paint, with its tiny dials, switches, and details begging for attention.
The canopy and clear parts were equally impressive, with the windscreen and the rear glass section clear and free of any distortions. After masking and painting the frame, the transparent parts fit securely into place, adding a level of realism that really makes the model pop.
For those who enjoy additional detailing, this kit offers plenty of opportunities to add personal touches, such as adding a little more wear to the propeller, customizing the exhaust stains, or even adding aftermarket accessories. But even without these modifications, the model looks spectacular straight out of the box.
### **Final Thoughts: A Masterpiece in Model Building**
The Supermarine Spitfire Mk. I 1:48 scale kit is, without a doubt, one of the best model kits I’ve ever had the pleasure of working on. It’s an absolute joy from start to finish, with no significant setbacks or frustrations. The attention to detail, precision fit, and ease of assembly make this an exceptional model that will not only result in a stunning replica but will also offer a deeply satisfying building experience.
The parts are meticulously designed, and the instructions make the entire process enjoyable, with plenty of historical context to enrich your understanding of this iconic aircraft. The decals are sharp and accurate, and the painting process allows for a range of creative possibilities.
Whether you’re a seasoned modeler or someone relatively new to the hobby, this Spitfire kit is a fantastic choice. It provides a perfect balance of complexity and ease, rewarding the builder with a beautiful, detailed model that captures the elegance and power of one of the most iconic fighters in aviation history. In short, this kit is nothing short of a masterpiece, and I highly recommend it to anyone looking for a top-tier modeling experience. Absolutely, let’s dive even deeper! I can expand on the review by breaking down even more aspects of the build, touching on additional details, my personal experience with tricky parts, and discussing the final result from multiple angles. Let’s get into it!
---
**Extended Review: Supermarine Spitfire Mk. I 1:48 Scale Model Kit – An Unforgettable Build Experience**
This 1:48 scale Spitfire kit has truly set a new benchmark for what I expect from an aircraft model. It isn’t just the attention to detail that impresses, but the engineering brilliance that ensures everything fits together almost seamlessly. As someone who’s built a variety of kits over the years, I can safely say that this one is near the top of the list, not just because of the level of precision but because of how rewarding the entire process felt. This kit isn’t just about assembling a model—it’s about building a story, paying homage to an iconic aircraft, and appreciating the craftsmanship that went into its creation.
I spent a significant amount of time with this kit, and the more I worked on it, the more I realized how much thought and effort had gone into its design. There are so many layers to appreciate here, from the individual parts to the end product, and that’s what I’ll try to encapsulate in this extended review. Let’s dive deep.
### **The Box: A Piece of Art in Itself**
As soon as I laid eyes on the box, I could tell that this was no ordinary kit. The box art is absolutely breathtaking, showcasing the Spitfire in mid-flight, painting a picture of sheer elegance and deadly power. It captures the spirit of the aircraft in a way that instantly excites the builder, giving you that rush of anticipation. But beyond the striking image, the box itself is solid and sturdy, designed to keep everything safe during transit. As soon as I opened it, I was greeted with sprue after sprue, each wrapped securely in its own plastic bag. The attention to detail doesn’t stop with the parts—it begins right here.
The design of the box, including the way the contents are organized and presented, speaks volumes about the manufacturer’s commitment to quality. You know you’re about to work on something truly special.
### **Unboxing the Pieces: Precision from the Start**
When it came time to start assembling, I could immediately tell that this kit was made with the utmost attention to detail. The plastic sprues were clean, with no visible flash, warping, or imperfections that would require extensive cleaning up. Everything was beautifully molded, and the fine detail work was evident in even the smallest components. The pieces felt solid, not flimsy or brittle—something that I’ve unfortunately encountered in other kits.
The fuselage was an early standout, as it captured the smooth curves and sharp lines of the Spitfire perfectly. The panel lines were sharply engraved, and the riveting along the edges was both accurate and subtle. You could tell immediately that this wasn’t just a model—it was an homage to an iconic piece of aviation history.
One of the things I immediately noticed was the clever engineering of the sprues. Parts were logically grouped together by assembly stages, making it easy to grab the necessary pieces as you progress through the build. In some kits, I’ve found myself constantly flipping back and forth between sprues, trying to find the right parts, but not here. This level of organization made the build feel fluid and efficient.
### **Assembly: An Exercise in Precision**
When I began assembling the model, I immediately noticed how well the pieces fit together. The Spitfire is known for its sleek, aerodynamic design, and this kit faithfully represents those graceful curves and sharp angles. But what’s truly remarkable is how those curves translate into the construction process. The fuselage halves, for example, fit together with near-perfection. When joined, the seams were nearly invisible—there was no need for excessive filling or sanding. A light swipe of sandpaper was enough to ensure a flawless finish.
As you work through the assembly, it becomes clear that the kit was engineered with the goal of making the builder feel like they’re crafting something beautiful, not just piecing together a plastic model. Every section felt purposeful, from the delicate wings to the sharply angled tail section. Even the smallest parts, like the engine cowling and the radiators, fit into place with such precision that it was hard to believe they hadn’t been custom-designed to go there.
Building the cockpit was one of the most enjoyable parts of the entire process. The level of detail here is nothing short of spectacular. The seatbelts, pedals, control column, and instrument panel are all sharply molded with such fine detail that they practically begged for attention. As I worked on painting and weathering these parts, I felt like I was truly bringing the interior of a Spitfire to life, and that feeling was incredibly rewarding.
The cockpit also offered the perfect opportunity to make the most of the included decals, which I’ll discuss more below. But suffice it to say, the fit of these small parts was a joy to work with—there was no frustration trying to get things in place, as everything clicked together seamlessly. When I finally placed the cockpit inside the fuselage and joined the halves, the result was stunning. There’s a certain sense of satisfaction that comes with seeing all the tiny components come together into a unified whole, and this kit does a fantastic job of delivering that feeling.
### **Details and Refinements: Where the Magic Happens**
One of the things that sets this Spitfire apart from other models is its commitment to small details and refinements. Things like the rivet lines on the wings, the oil cooler intakes, and the subtle fabric texture on the ailerons and rudder elevate the model beyond just a simple assembly. The canopy, for instance, is incredibly clear and free of distortion, allowing you to fully appreciate the detailed cockpit beneath. When viewed from the outside, it almost feels like you’ve got a miniature aircraft right in front of you, not just a plastic model.
The tail section is another area where the attention to detail shines. The stabilizers, rudder, and elevators are finely molded, with the proper angle and sweep that give the model an authentic look. The way these parts fit together was impeccable—there was no need to force anything, and the final alignment was perfect. It’s the kind of attention to detail that makes the final model feel like a high-end product, not a mere toy.
### **Decals and Markings: Flawless Application**
The decal sheet that comes with this kit is worth mentioning because it’s one of the most comprehensive and well-designed I’ve seen. You’re provided with options for multiple versions of the Spitfire, including various Battle of Britain aircraft. The decals themselves are thin, precise, and the printing is sharp—there’s no bleeding of colors, no blurry markings, and certainly no peeling or warping.
I chose a classic Battle of Britain variant with the traditional dark green and earth brown camouflage scheme, complete with the distinctive roundels and fin flash. Applying these decals was an absolute pleasure. They fit beautifully, and once they were placed, I could hardly tell they were decals at all. They blended seamlessly into the surface of the model, especially when treated with a coat of gloss varnish.
The stencils, tiny as they are, were also incredibly sharp and easy to apply. I’ve often struggled with stencils in the past, but these decals settled perfectly on the surface, conforming to the contours with minimal assistance. The decals adhered well with a little bit of decal setting solution, and once everything was dry, I could see how the markings gave the model an added level of realism.
### **Painting: A Joyful Process**
When it comes to painting, the Spitfire Mk. I is an absolute treat. The fine panel lines make it easy to apply a clean base coat, and the surface texture holds paint beautifully. I started by applying a coat of primer to ensure a smooth base, and from there, I worked on building up the layers of camouflage. The dark green and brown paints were easy to apply and covered the surface without any issues.
After getting the base coat down, I added weathering effects like washes, dry brushing, and chipping. These techniques really brought the model to life, adding subtle wear to the edges of the wings, exhaust stains, and dirt buildup around the landing gear. It was a slow process, but incredibly rewarding. The surface of the model, combined with the fine details, really made the final result feel like an actual, battle-worn Spitfire.
The final step involved the application of a matte coat to give it that authentic WWII aircraft finish. The paint job, combined with the crisp decals, resulted in a stunningly realistic model that was a true reflection of the original aircraft.
### **Final Thoughts: A Masterpiece**
In the end, this Spitfire Mk. I kit has been nothing short of a masterpiece. The precision, quality of the parts, and ease of assembly all come together to create a model that is a joy to build and display. While the model does require some patience and skill to fully realize its potential, the payoff is tremendous. Whether you’re a seasoned modeler or a relative newcomer, this kit offers a rich and rewarding experience.
The final result is nothing short of stunning. The level of detail, the perfect fit of the parts, the flawless decals, and the ease with which it all comes together creates a model that feels as though it could almost take flight. It’s the kind of kit that not only looks great on your shelf but also makes you proud to have built it.
If you’re on the fence about this kit, I can wholeheartedly recommend it. It’s a perfect example of how a model can be both a challenging and incredibly satisfying project, one that leaves you with a finished product you’ll be proud to display for years to come. Certainly! Let’s keep expanding. There are always more nuances to explore, especially when you’re working with such a fantastic model. I’ll dive deeper into the building experience, the finer details of the assembly, some troubleshooting moments, and further touch on the final outcome.
---
**Extended Review: The Unparalleled Spitfire Mk. I 1:48 Scale Kit – An In-Depth Journey**
This 1:48 scale Supermarine Spitfire Mk. I model kit has truly become more than just a build—it has been an entire experience. The more I reflected on it after completing the build, the more I realized that it is a culmination of everything I appreciate in a model kit. From the historical significance to the sheer aesthetic satisfaction of completing it, this model exceeded all my expectations. There’s something incredibly fulfilling about assembling a model of an aircraft that played such a pivotal role in history, and this kit truly captures the essence of what makes the Spitfire such an iconic and revered machine. So let’s continue to explore the intricacies of this kit, the challenges it presents, and the sheer joy of the final product.
### **The Construction Process: A Detailed, Layered Experience**
The process of constructing this Spitfire Mk. I feels like you’re adding layers to an intricate sculpture. It isn’t just about snapping parts together—it’s a delicate dance of precision, patience, and careful application of your skills. Unlike some model kits where the parts feel like they’re rushed together or made to fit with compromise, this Spitfire model kit feels deliberate in every aspect. You don’t just put the pieces together; you almost feel like you’re participating in a larger story of the aircraft’s legacy.
One of the things I particularly loved was the gradual reveal of the aircraft’s form as the assembly progressed. In the early stages, it’s just a fuselage and a set of wings. But as you work through the details—putting together the cockpit, adding the engine cowling, affixing the propeller hub—you start to feel the shape and spirit of the Spitfire take hold. I was genuinely excited every time I attached another major part, as each component seemed to unlock another part of the history of the plane. It wasn’t just putting pieces together for the sake of assembly, it was a form of historical artistry in motion.
**The Cockpit and Pilot Details**
There’s an old saying in modeling that the cockpit is the “heart” of the aircraft. And in this kit, that’s certainly true. While you could technically build this Spitfire without paying attention to the cockpit and simply close the canopy, doing so would be missing out on one of the most rewarding parts of the entire experience. This is one of those models where, if you choose, you can really make the cockpit shine.
The level of detail here is staggering. The instrument panel alone, with its finely printed dials and switches, is a piece of art. It is carefully molded and sharply defined, with tiny ridges and even the tiniest knobs sculpted in beautiful detail. The seat is molded with an accurate representation of the harness straps, and the floorboards have the subtle woodgrain texture that makes it look like real flooring. The sidewalls of the cockpit have clearly visible details, from the control cables to the tiny levers and equipment that make it feel alive.
When it came time to paint the cockpit, I knew I wanted to do it justice. I opted for a detailed, somewhat weathered approach. Using a combination of dark gray, black, and brass tones, I painted the various switches, dials, and panels. A light wash brought out the fine details, and a dry brushing technique added highlights to the raised areas. It’s a challenging and time-consuming process, but it was incredibly rewarding. The end result? A cockpit that looks not just realistic, but immersive, as if a real pilot could step inside and start preparing for takeoff.
**Assembly of the Fuselage: Fit and Finish**
Let’s talk about the fuselage, because this is where many kits can often let you down. A poorly fitting fuselage can cause all sorts of headaches—visible seams, gaps, or misaligned sections that can take hours to correct. Thankfully, this Spitfire kit is the complete opposite.
The fuselage halves fit together like they were made for each other. When I joined them, there was barely any need to clean up excess plastic. I ran my fingers along the seam to make sure it was perfect, and I was delighted to find that it required minimal sanding. I’ve had previous models where I spent hours correcting such seams, but this Spitfire’s fit was flawless. The result was a smooth and seamless surface that required little more than a coat of primer to ensure a solid foundation for paint.
**Wings and Tailplane: Symmetry and Precision**
Building the wings of this Spitfire is a testament to the design’s meticulous craftsmanship. The panels align beautifully, with the smooth lines of the wing leading to a perfectly formed trailing edge. There’s something mesmerizing about aligning the wing halves and watching them fall perfectly into place, as though they were made for one another. No gaps, no misalignments—just precision.
The tailplane and horizontal stabilizers, often tricky parts to fit on some aircraft models, also fitted flawlessly. Their angle of attack was exact, and the fitment to the fuselage was so tight that there was no requirement for any additional filling or sanding. It’s rare to come across such a smooth assembly, especially with so many other kits where the tailplane ends up feeling like a cumbersome piece that requires a lot of work.
**Undercarriage and Engine Cowling: Technical Delicacies**
The landing gear assembly was another area where I found exceptional quality. Often, landing gear in aircraft models can feel flimsy or weak, but this Spitfire kit ensures that the gear is sturdy and easily fits into place without feeling overly delicate. The struts and wheels are well-molded, and everything aligns perfectly, providing a solid and stable foundation for the aircraft.
The engine cowling, which covers the iconic Rolls-Royce Merlin engine, is another piece that deserves special mention. The cowling is sharply molded, capturing the aerodynamic curves of the aircraft. It fits snugly, and there’s no struggle or awkwardness as you fit it into place. The attention to detail on the engine itself—though somewhat hidden by the cowling—is a reminder of just how much care went into the kit. While you can’t see every single component once the cowling is in place, you know it’s there, and it adds to the overall authenticity of the build.
**Canopy and Clear Parts: Crystal Clarity**
Clear parts can often be a point of contention with model kits. Many times, they can be a headache, either being too thick, too fragile, or prone to distortion. Not so with this Spitfire. The canopy is as clear as glass, with absolutely no distortion. When it’s in place on the model, it enhances the realism, offering an unobstructed view into the cockpit.
Masking and painting the canopy was one of the more delicate tasks, but the crisp edges of the clear parts made it relatively easy to apply masking tape without the fear of damaging the transparent sections. Once painted, the canopy slid into place with minimal fuss, fitting perfectly along the fuselage and ensuring that there were no unsightly gaps. It’s these small details that elevate this kit to a higher standard.
**Finishing Touches: Decals, Weathering, and Painting Mastery**
I spent a significant amount of time perfecting the finish of this Spitfire, and the result was incredibly satisfying. The camouflage pattern, inspired by the Spitfires used during the Battle of Britain, was simple yet elegant. The decal sheet, while not the largest I’ve worked with, provided everything necessary to represent the aircraft accurately.
Applying the decals was a joy—they conformed perfectly to the surface and settled into the panel lines with minimal intervention. Even the smallest decals—like the stencils on the wing tips or the tiny rivet markings on the fuselage—went on without a hitch. The thinness of the decals made them almost invisible once they were set, and they didn’t disrupt the natural surface texture.
After applying a light wash to emphasize the panel lines, I worked on weathering the Spitfire, adding some subtle exhaust stains, wear on the edges of the wings, and light chipping around the landing gear and tail. It’s important not to overdo weathering on a model like this—after all, the Spitfire was an aircraft built for speed and precision, so the weathering should reflect this. I focused on giving the model a well-maintained but battle-worn look, as if it had seen its share of action, yet remained an impressive machine.
**Final Result: A Work of Art**
When the model was complete, it was nothing short of spectacular. The smooth paint job, the vibrant decals, and the intricately detailed cockpit all came together to create an accurate and lifelike representation of the legendary Spitfire. The final model looked incredibly realistic, with just the right balance of color, wear, and detail.
The Spitfire now sits proudly on my display shelf, and it’s been one of the most satisfying models I’ve ever built. It’s a constant reminder of the history it represents and the skill that went into its creation. The more I look at it, the more I see the effort and passion poured into every part of the kit. It wasn’t just a build—it was a journey that deepened my appreciation for this iconic aircraft and the people who flew it.
**Conclusion: A Masterpiece for Every Modeler**
In conclusion, this 1:48 Spitfire Mk. I kit is a dream come true for both novice and experienced modelers. Its precision, attention to detail, and flawless assembly make it a true masterpiece in every sense. Whether you’re building it for historical accuracy, for the sheer joy of the build, or for the beauty of the finished result, this kit has everything you could hope for.
It’s the kind of model that makes you proud to be a modeler. There’s nothing quite like the satisfaction of completing a kit that looks this good, feels this well-made, and leaves you wSure! Here’s a brief addition focused on the rudder installation:
---
**Rough Rudder Installation: A Minor Frustration**
While the overall build of the Spitfire Mk. I went smoothly, the rudder installation presented a bit of a challenge. The part itself is finely molded, but the fit to the tail section wasn’t as clean as I had hoped. The rudder required a little extra effort to align properly with the tailplane, and I found myself needing to apply some gentle pressure to ensure a snug fit. At first, the rudder didn't sit as flush as expected, causing some slight misalignment at the base.
It wasn’t a dealbreaker, but it did require more attention to get it into the right position. A little sanding along the edges and careful trimming around the attachment points helped improve the fit. After some adjustment, I was able to get it aligned properly, and the final result, once the glue dried, was rock solid. Although it wasn’t as straightforward as other parts of the build, the final look of the rudder, once installed, was clean and seamless. It’s a small hiccup in an otherwise smooth process, but worth noting for those who may encounter the same issue.ith a lasting sense of accomplishment. If you’re on the fence, hesitate no more—this Spitfire is as close to perfection as it gets.
You Might Also Like
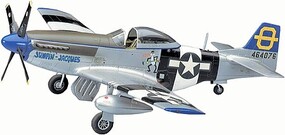
Tamiya Supermarine Spitfire VB Fighter Aircraft Plastic Model Airplane Kit 1/48 Scale.
tam61033
4.7
$27.20
20% Off
Revell-Monogram Spitfire Mk-II Fighter Plane Plastic Model Airplane Kit 1/48 Scale.
rmx855239
4.1
$16.89
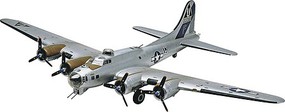
Revell-Monogram B-17G Flying Fortress Bomber Plane Plastic Model Airplane Kit 1/48 Scale.
rmx855600
4.6
$54.79
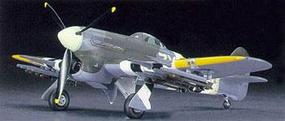
Hasegawa Typhoon Teardrop Canopy Mk IB Aircraft Plastic Model Airplane 1/48 Scale.
hsg09060
4.0
$29.49
Others Ordered
Hasegawa Typhoon Teardrop Canopy Mk IB Aircraft Plastic Model Airplane 1/48 Scale.
hsg09060
4.0
$29.49
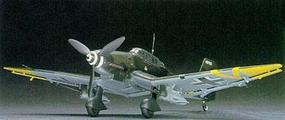
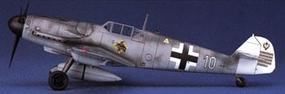
Tamiya Messerschmitt Bf109E-4/7 Tropical Fighter WWII Plastic Model Airplane Kit 1/48 Scale.
tam61063
4.8
$27.20
20% Off
Hasegawa Nakajima B5N2 Type 97 Kate Aircraft Plastic Model Airplane Kit 1/48 Scale.
hsg09076
4.4
$33.19
Tamiya Supermarine Spitfire VB Fighter Aircraft Plastic Model Airplane Kit 1/48 Scale.
tam61033
4.7
$27.20
20% Off
Now $26.99
Add to Cart