Porsche Carrera GT Sportscar Covertible
Item Number: tam24275

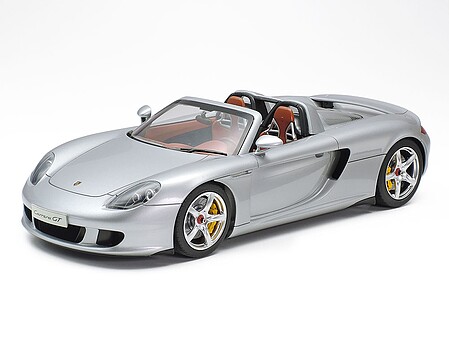
Porsche Carrera GT Sportscar Covertible
Item Number: tam24275
Now $49.60
$62.00
Get x2 Rewards!
Earn 2718 Rewards Points
Add to Cart

About This Item
Product Details
The Porsche Carrera GT grabbed the world's attention when first unveiled as a concept car at the 2000 Paris Auto Show. Promoted as Porsche's next generation flagship super sports car, the Carrera GT was officially unleashed onto the international motoring market in 2003. Incorporating the latest and most extreme racing technology, the Carrera GT lines up against the impressive range of super sports cars offered by the worlds top makers, such as the Enzo Ferrari and the Mercedes-Benz SLR McLaren. Featuring a powerful 5.7 liter V10 engine, carbon-fiber monocoque chassis and push-rod suspension all wrapped up in classic Porsche style and elegance, the Carrera GT is the ultimate high-end sports
Product Rank
Includes
1/24 Porsche Carrera GT
Features
- This static display model has accurately reproduced the elegant form of the actual car!
- Removable roof panels allow the reproduction of an open-top or hardtop model.
- Authentically reproduced 5.7 liter V10 engine.
- Opening rear cowl.
- Model with the rear spoiler either in up or down position.
- Metal plated parts used to reproduce wheels, light reflectors and exhaust pipes.
- Porsche emblems and mirrors are reproduced with metal transfers.
- Illustrated assembly guide.
Requirements & Suggestions
Specifications
- Scale: 1:24
- Length: 7-5/8" (194mm)
- Width: 3-1/4" (83mm)
- Tamiya Product Number: 24275
Reviews
Review Summary
The reviews highlight that this model kit is highly detailed and well-engineered, with impressive fit and quality of parts, though it poses a significant challenge due to the meticulous paint work and assembly process required. Many builders appreciate the realistic engine, interior, and body details, but note that it is not suited for beginners due to small, delicate parts and the need for careful test fitting and painting. Some minor issues with specific components, like fit or functionality, were mentioned, but overall, the finished product is considered rewarding and visually striking.
You Might Also Like
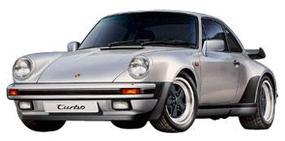
Tamiya Porsche 911 Turbo 1988 Sportscar Coupe Plastic Model Car Kit 1/24 Scale.
tam24279
4.7
$32.00
20% Off
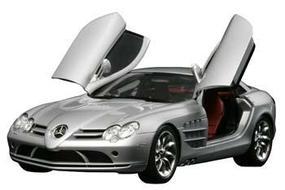
Tamiya Mercedes-Benz SLR McLaren Sportscar Coupe Plastic Model Car Kit 1/24 Scale.
tam24290
4.5
$64.80
20% Off
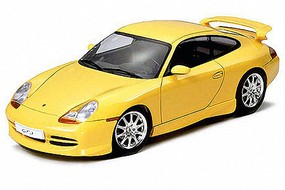
Tamiya Porsche 911 Carrera GT3 Sportscar Plastic Model Car Kit 1/24 Scale.
tam24229
4.6
$32.00
20% Off
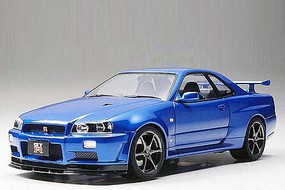
Tamiya Nissan Skyline GT-R V-Spec II Sportscar Plastic Model Car Kit 1/24 Scale.
tam24258
4.8
$29.60
20% Off
Others Ordered
Tamiya Mercedes-Benz SLR McLaren Sportscar Coupe Plastic Model Car Kit 1/24 Scale.
tam24290
4.5
$64.80
20% Off
Tamiya Porsche 911 Carrera GT3 Sportscar Plastic Model Car Kit 1/24 Scale.
tam24229
4.6
$32.00
20% Off

Tamiya Porsche 911 Turbo 1988 Sportscar Coupe Plastic Model Car Kit 1/24 Scale.
tam24279
4.7
$32.00
20% Off
Tamiya Nissan Skyline GT-R V-Spec II Sportscar Plastic Model Car Kit 1/24 Scale.
tam24258
4.8
$29.60
20% Off

Now $49.60
Add to Cart