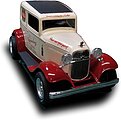
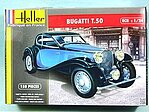
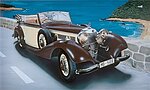
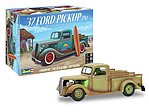
I loved this kit; it was a challenge to build and resulted in a beautiful piece. The first 3 steps went together well, but then things began to go south. There was a little flash that was easily removed. No big deal. The front axle in step 4 featured poseable steering but the mechanism was too floppy and the wheels too wobbly to successfully pull this off. I loved the idea, but ended up gluing everything solid. In step 7 I recommend installing the shifter and handbrake in step 8 after installing the seat. In step 8 install the rumble seat bottom to the rear of the locating pins, otherwise a large gap will result with the seat back. Also, undercut the lower inside of the rumble seat opening otherwise the seat will be locked in the closed position. Again, in step 8, the front seat was too large. I trimmed 2 mm from the bottom, separated the back from the bottom, then trimmed 3 mm from the cushion before gluing it back together. In step 9 the tail lights needed to be pinned using wire to ease assembly. In addition, the bottom of the hood spear needed to be sanded to allow it to sit flush. Styrene strip can be added to the bottom of the running boards to support the chrome trim. As you can see from numerous member pictures, the result can be nothing short of stunning!

;)
;)
;)
;)
;)
;)
;)
;)
;)
;)
;)
;)
;)
;)
;)
;)
;)
;)
;)
;)