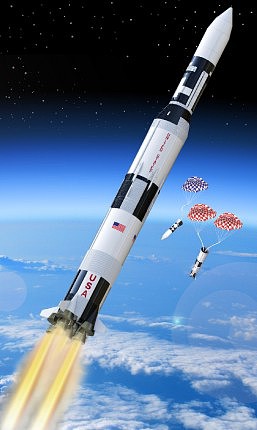
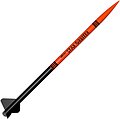
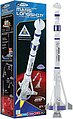
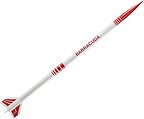
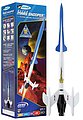
Saturn V Skylab

This is the Estes Saturn V Skylab model rocket kit level pro.

Estes Saturn V Skylab Model Rocket Kit Level Pro #1973
 (4)
 Estes Rockets # est1973
$87.49
 
Retail $109.99  SAVE 20% !
Estes Rockets Item # est1973
Features :
  • One Model Rocket Kit
  • Detailed Instructions
  • Skill Level: 5
  • Recovery: Parachute
  IN STOCK
USA Ground Shipping Only
Not eligible for Free-Shipping
Website security verified by GoDaddy.

Spotlight Review

 
"Rocket"
james
Great model of a great rocket. Looks great.Would recommend this to every one.

You Might Also Like

← Swipe To View More →

Features

  • One Model Rocket Kit
  • Detailed Instructions
  • Skill Level: 5
  • Recovery: Parachute

Specs

  • Estes Product Number: 1973

Requirements & Suggestions

For How To Launch a Model Rocket

For How To Build a Model Rocket

← Swipe To View More →


Reviews


"Saturn V skylab rocket"
Roman011863
In perfect condition. Great model rocket.I recommend this product to all model rocket hobbyists

 
"Fun to Build, Launch and Display"
Mickey Mchugh (Galveston, Texas)
Back in the 1990s, I used to build and launch several Estes rockets with my family. We had lots of good times. I always wanted to get back into model rockets since we all enjoyed that pastime. At the beginning of 2023, I decided to start a NASA model rocket building program beginning with an Estes Saturn V Apollo 11 1/200 scale RTF #2160 and the Estes SLS 1/200 scale RTF #2206. After launching both several times, I knew I wanted to go bigger, higher and provide more WOW factor. I purchased an Estes Saturn V Skylab 1/100 scale #1973 kit and found that Estes had upgraded the first and second stage section of this new kit to use a 29mm engine mount tube and improved the fin design. The design of their vacuum-form fairings and their effort to make them stronger by attaching a card bottom to them is not to scale (does not follow the design of the actual Saturn V fairings). They also used the same style thin paper centering rings. The improved fins were still only vacuum form plastic, not very strong and attached to the lower body wrap. I decided to upgrade for additional strength by using 1/8” plywood centering rings and a 3D printed Fin Can and, in the process, get more durability. To solve the fin / engine fairing problem, I decided to use a Saturn V 100 scale 3D printed Fin Can (Engine Fairings & Fins) assembly with 29mm center engine mounting. I added a detachable motor mounting assembly consisting of a centering ring, a 2.5” 29mm engine mounting tube and a 29mm engine retainer (Estes 072412). This assembly slides up into the center of the fin can and butts up to the 29mm engine mounting tube. I attached it to the bottom of the fin can with 4 retaining screws so it can be removed. I used two centering rings made with 1/8” plywood on the top and middle of the motor tube. I installed two eye bolts on each side of the top centering ring for attaching the dual shock cords. To handle the extra weight and provide durability, I used two (2) 24 Highly Visible Nylon Parachutes for the heavy first and second stage section (510g). Each chute has a snap swivel to connect to its own shock cord of 550lb yellow Kevlar cord which is attached to an eyebolt on the upper centering ring. For display purposes, I mounted the provided five F-1 engines painted with Bright Gunmetal TS100 to a modified bottom plate (the heat shield) made of 1/16 inch card stock which replaces the detachable motor mounting assembly for static display which makes for an awesome model of the Saturn V for display purposes. I noticed that the engine mounting plate provided by Estes is wrong. The gimble block of the four outboard engines should be located further outboard right at the very edge of the airframe with the turbopump connection facing inboard. The center engine gimble block should be in the center of the bottom plate with its turbopump connection in line with the turbopump and gimble block of the outboard engine next to the “C” fin. Both turbopump connections should be next to (facing) each other. I modified the second stage to third stage transition to make it stronger by using a centering ring made with 1/8” plywood. I added a 29mm motor mount tube running from the top of the Skylab nose cone down to the bottom of the transition plywood centering ring with a 29mm motor retainer attached. This is to house two containers (Estes Retainer Tube, part number 30450 from kit #1969 with an 29mm OD). These containers are to allow adding clay as needed to provide the weight required to stabilize for the increased mass of the engine Fin Can (108g), plywood centering rings, and depending on which engine is used, the E16-4 (78g) or F15-4 (110g). A third container is placed below the weight containers for any instrumentation, like an Estes altimeter #2246. I use two to get a good altitude reading. The retainer keeps the containers in place in the nose cone and allows the altimeter(s) to breathe but allows easy removal of the containers. I installed an eyebolt to the centering ring located in the bottom of the transition to attach a parachute shock cord for the upper section, (Skylab & nose cone). I used one (1) 24 Highly Visible Nylon Parachute for this heavy upper section (200g). This model is super WOW and my kids and grandkids love launching it! We were able to make a perfect launch on May 14, 2023, the 50th anniversary of Skylab.

Others Also Ordererd

← Swipe To View More →